You’ve taken a failure of a photo and don’t want to send it to the Recycle bin. Relax: you’re not alone. It’s happened to us all that a snapshot we really wanted doesn’t turn out well. Can you get it back? The answer is no, but it can be fixed or modified. There is a lot you can do in Photoshop to improve images and we’ve put together some basic Photoshop tutorials to help you do so.In other words, in this post, we’ll show you how to “make up” a bad photo. Of course, don’t forget the basic principle of design: if there’s nothing to work with, there’s nothing to work with. Leave magic to magicians.
Image editing with Adobe Photoshop opens a world of possibilities as you can resize images, straighten, change the aspect ratio, crop images, and more. Let’s not waste any more time, and get straight into basic tips for editing images on Photoshop.
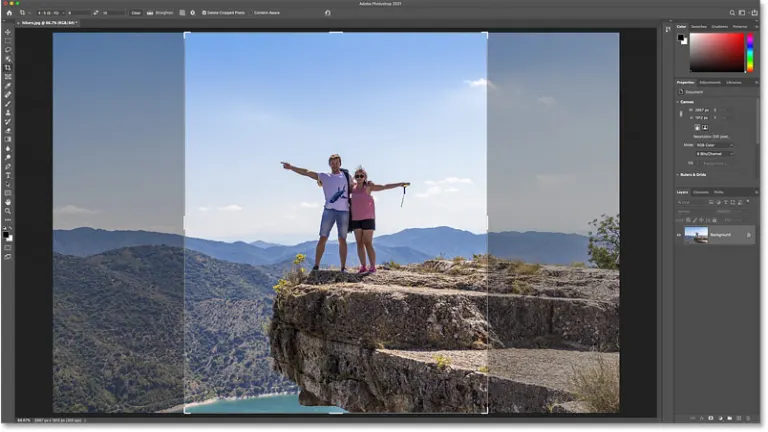
How to crop your photo
The first trick is how to use the Photoshop crop tool. Maybe your snapshot isn’t good because it has secondary elements in the scene. For example, you’ve taken a landscape shot, and in the lower corner, you’ve caught a person. You can always “crop” the figure and fix it.
To do this, click on the icon below the Magic Wand, right-click on it and select Crop Tool. The rest depends on you and your creativity, of course. You can select a crop area and delete cropped pixels falls outside the crop boundaries. You’ll keep everything inside the crop box and the cropped area outside it will be deleted.
To do this you simply double-click your mouse button or press enter. Doing so will leave you with just the cropped image although you can easily get the original image back by undoing your action.

Adjust lighting (or modify the histogram)
This is a classic: adjust the photo’s lighting. Or technically speaking, open the histogram. To do this, you only need to press Control + L. What if you don’t have much confidence with keyboard commands? Then go to Enhance -> Adjust Lighting -> Levels.
We’ll point out that dealing with histograms isn’t easy since you can destroy different intensity levels with a few simple clicks. Our advice, if this happens to you, is to click on Automatic Levels and Photoshop will take care of the rest. Also, you can do tests and see how they turn out. As long as you don’t click OK, everything is permitted (as they famously say in Assassin’s Creed).

Say goodbye to Photoshop: Meet the 5 best online photo editing alternative
Read nowUse available filters
Filters. Who doesn’t know about filters these days? Tools like Instagram and Facebook have popularized filters for photos. They take default settings and apply them to the snapshot in question. We’re not in love with them (nobody is in the audiovisual world), but it’s a good option for saving some photos.
In Photoshop, it appears in the upper section as Filters. There are so many, they could fill an article alone. Try them out!
Say goodbye to Photoshop: Meet the 5 best online photo editing alternative
Read now
Adjust color levels
We’ll wrap up our special tricks to fix an image using Photoshop with Adjust color settings. To find it go to Enhance -> Adjust Color.
Problems with adjusting color? Well, like the histogram, if you don’t know how to control different photo settings, you’ll likely end up overloading the photo. It’s that simple. You can do color tests by sliding the three available bars since before you click OK, the work won’t be saved (so you can preview how the image