How To
How to apply a color cut-out effect in Photoshop
- June 9, 2011
- Updated: July 2, 2025 at 9:00 AM
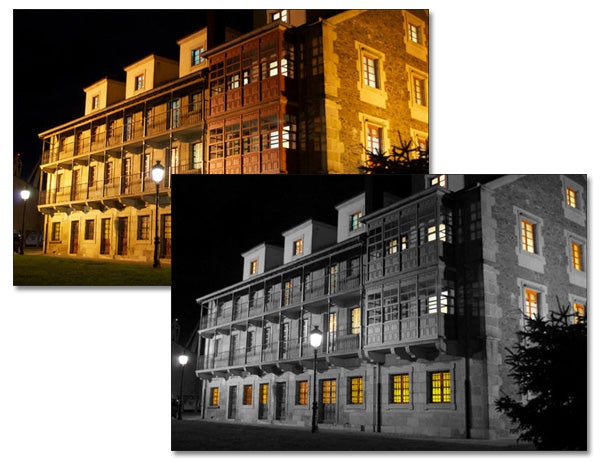
I’ve always felt a special fascination for color effects applied to black and white images. So, when I saw this quick Photoshop tutorial on the OnSoftware BR blog, I couldn’t help trying it out! It’s a very simple effect often used to draw attention to certain areas in the image, and it’s really easy to apply. Just follow these steps and turn any image into a little piece of black and white art.

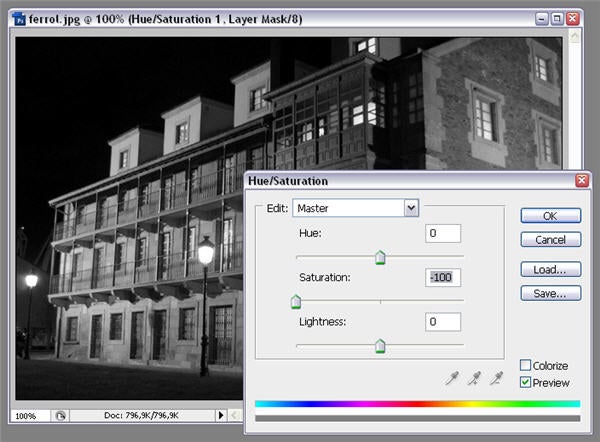
1. Open the image you want to work with and go to Layer > New Adjustment Layer > Hue/Saturation. Create a new layer and then move the Saturation slide to the left side until que image goes black and white.

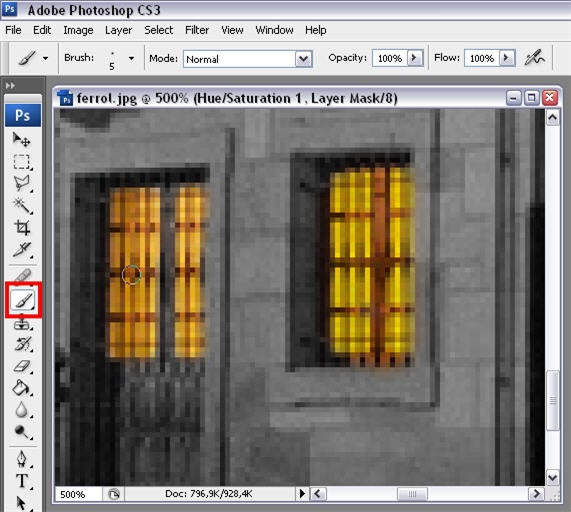
2. Now grab the Brush, zoom in the image to work more comfortably and start painting those areas you want to stand out. You’ll notice the original color comes up as you paint on the photo. Adjust the brush size as necessary, make sure you stop from time to time in case you have to undo an action, and with a little bit of patience you’ll finish the image in no time.

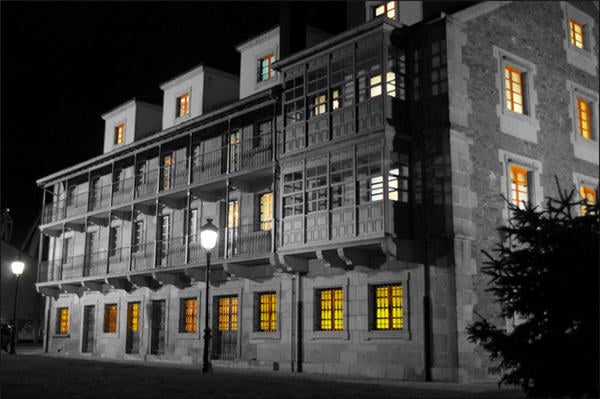
3. There you go! Your color cut-out effect is ready.

You may also like
- News
The impressive premiere of Superman is overshadowed by poor results in China
Read more
- News
The first image of the Harry Potter series for HBO Max shows us what its protagonist will look like
Read more
- News
Luca Guadagnino dares to explore the world of Artificial Intelligence in his new film, and with an incredible cast
Read more
- News
One of the actors from 'Stranger Things' has revealed what was the last thing they filmed before finishing the series
Read more
- News
Paramount+ has removed 'South Park' from its catalog, and its fans are threatening to burn down their headquarters
Read more
- News
Switch 2 is going to lose one of its most controversial elements, and no one will miss it
Read more
