Photoshop Express is basically a lite version of Adobe Photoshop that you can use on your iPhone. You can edit a single photo or layer multiple images into collages or composites.
The app is full of filters and effects that use sliders to help you find exactly the right settings. You can also apply text, border, or sticker overlays to your images to make memes or add watermarks or captions. In this article, we’ll take a look at all the most exciting features of Photoshop in iPhone and show you how to perform some of the most common photo edits.
Get familiar with the panels
Photoshop Express is divided into three spaces. The Tools Panel is at the bottom, the Image Workspace displays in the middle, and the more technical Options Panel is at the top.
When you open the app, the Options Panel shows icons like Edit, Mix, Collage, and Retouch. We’ll start with the Edit section, where you can apply effects and filters to a single photo.
Load images through Edit option
Click on Edit at the top and then tap the camera, plus sign, or globe icon in the bottom panel to load the image you want to edit. Once the picture from your camera, photo gallery, or network loads up, the Options Panel at the top will change to show you the Undo and Save buttons plus a few more.
You’ll also see the Tools Panel at the bottom of the screen change to show you the most common editing tools. Tap any icon there and a secondary menu will appear just above the bottom menu. Each tool in this menu comes with a slider so you can adjust its intensity.
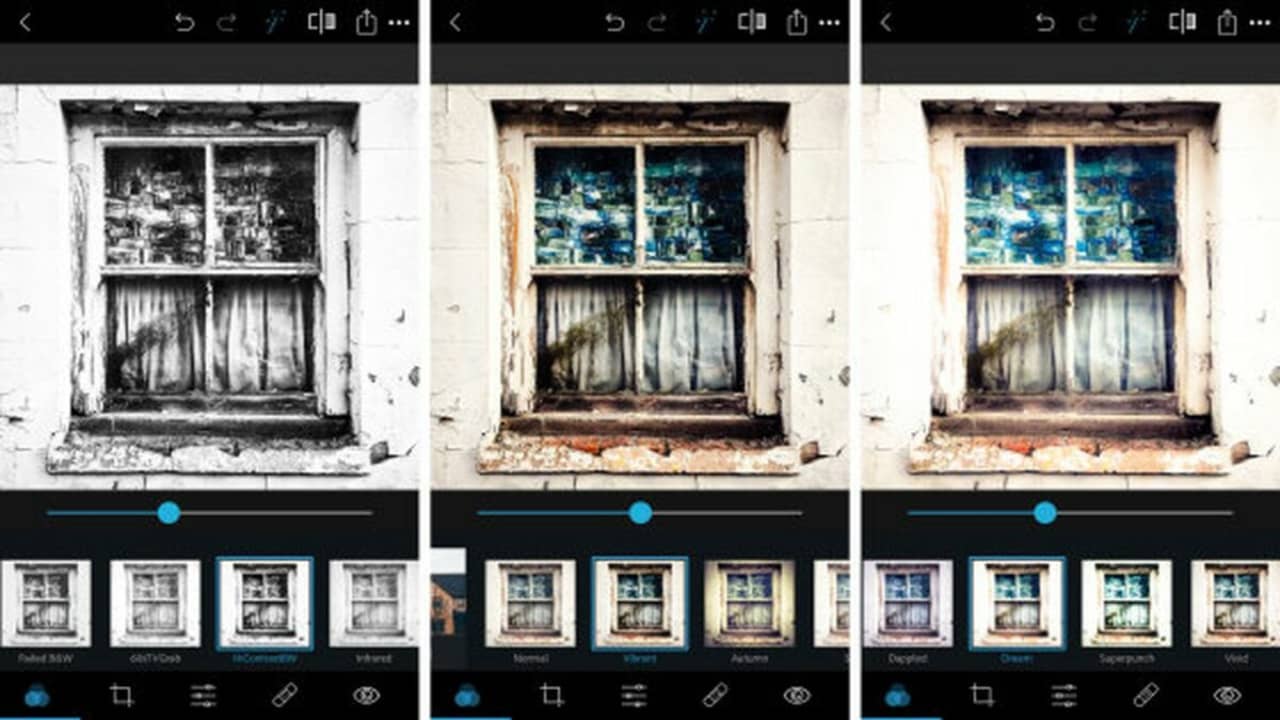
Using filters via the Looks menu
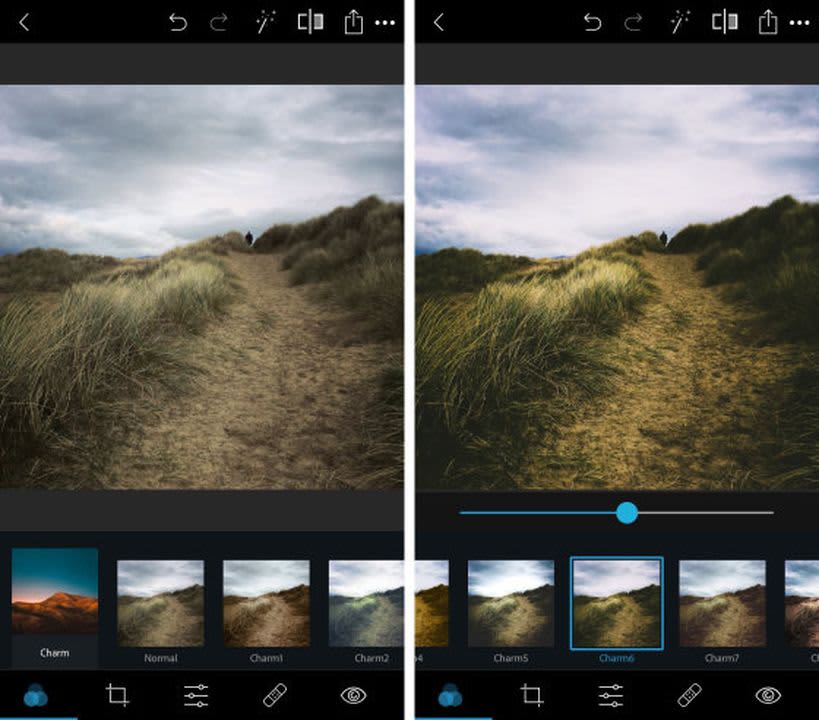
The first icon in the bottom panel, showing three intertwined circles, pulls up the filter menu, which Photoshop Express calls Looks. The Looks are divided into categories like Nature, B&W, and Duo Tone.
You’ll find plenty of individual filter options inside each category. The large thumbnail over each one will show you how your photo will look if you apply the filter.
Access more effects through Light Leaks
The Light Leaks icon in the bottom panel looks like two overlapping circles, one white and one black. This menu has an enormous selection of lens flares, raindrops, bokeh, and other fun lighting effects that can spice up your image. Pick one, and the AI will do most of the work. All you have to do is adjust the effect’s size using the slider.
Modify size and fit

To play around with your photo’s size and fit, tap the icon in the low panel showing two intersecting 90-degree angles. You can crop your picture, change the aspect ratio to adjust its artistic composition, straighten out the horizon, create an upside-down or mirrored version, or correct perspective issues using the Skew tool.
Using adjustment tools
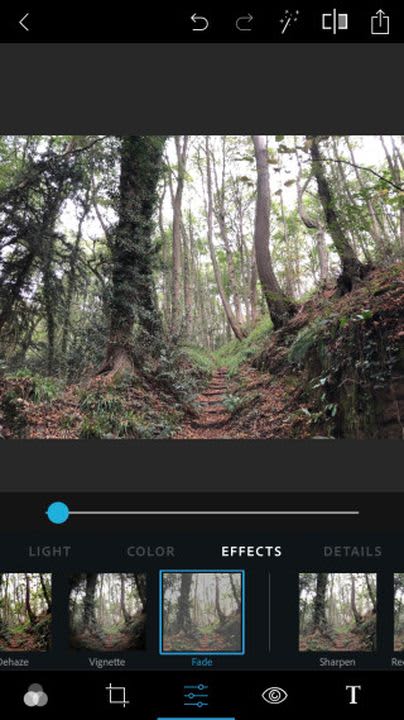
The bottom toolbar’s next icon, showing two horizontal sliders, gives you access to the app’s adjustment tools. These include Light, Color, Effects, Details, and Blur.
The Light menu lets you tweak your photo’s highlights, shadows, exposure, and contrast. The Color panel lets you adjust the temperature, tint, and saturation.
In the Effects menu, you’ll find whimsical enhancements to bring out specific textures, fade colors, and add fog, grain, or vignette effects for an old-fashioned look. In the Detail category, you can sharpen your image and adjust the amount of noise. The Blur section lets you selectively add different kinds of blur effects to different parts of your pictures to help direct the viewers’ attention.
How to selectively adjust colors and brightness
The Adjustment workspace comes with an automatic selection tool that uses AI to identify specific features like the subject and the background. To selectively change the brightness or colors of a certain part of your photo, use the selection tool to target the problem area with a single tap, and then use the slider to tell the app how much of the effect to add.
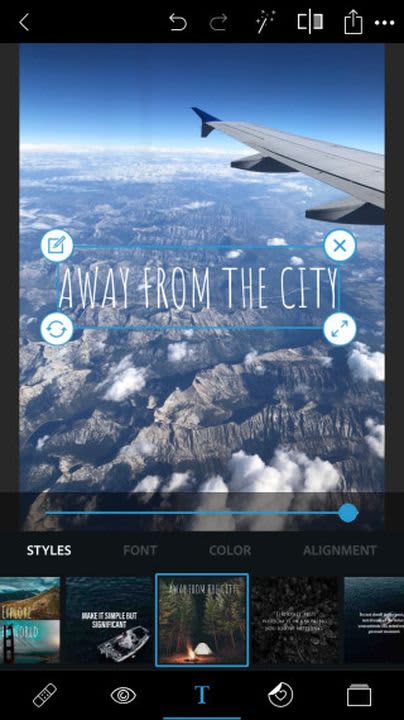
Adding text
If you want to add some text, tap the T icon in the bottom panel, and use two fingers to draw a text box on your photo. Tap the pencil icon in the text box’s top left corner to type your message, or rotate, resize, or delete the box using the icons in the other corners. You can change the style, font, color, or alignment of your text in the secondary Tools menu that pops up at the bottom.
Adding stickers and borders
Beside the Text icon in the bottom panel is the Stickers icon, where you’ll see a tiny heart in a circle. The stickers are divided into convenient categories, and you can resize or rotate them using two fingers.
The Borders icon in the bottom panel looks like a square frame. This is where you can fade the edges of your image or use decorative outlines and frames to add style.
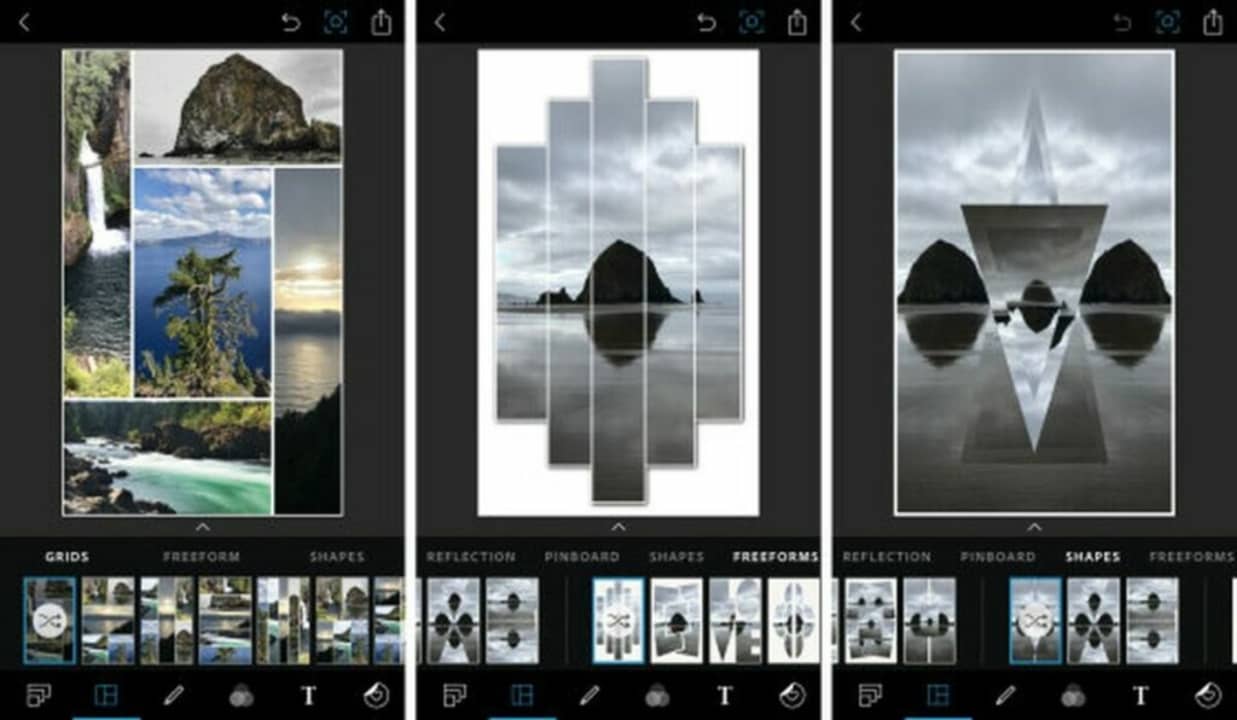
Combining multiple photos
To make a collage from multiple photos, select Collage from the Options Menu when you first open the app. Once you choose the photos you want to use, the app will show you its massive collection of collage templates so you can get creative. You can combine various photos on your iPhone, adjust the position and size of each photo in your collage, or even merge two images into a single image.
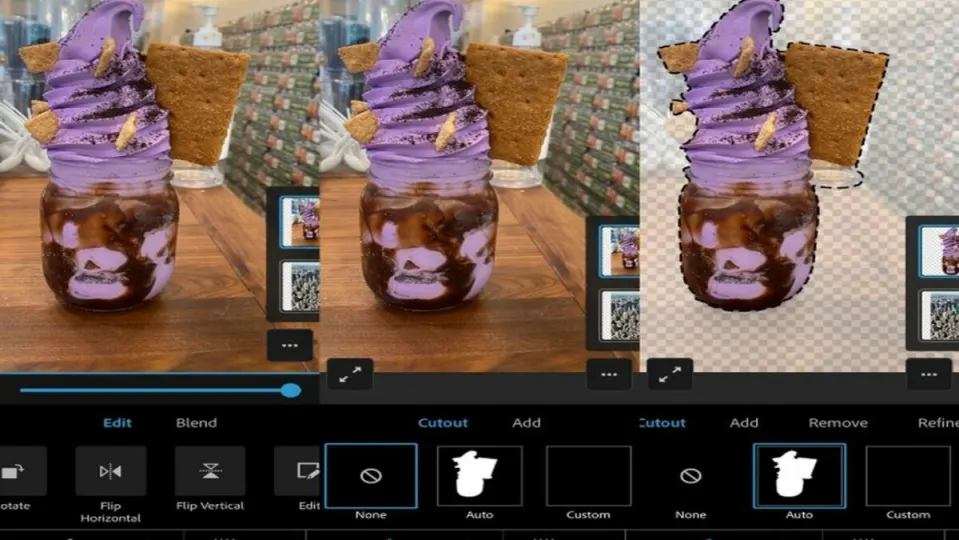
Mixing images
The Mix workspace allows you to layer multiple images on top of each other. You can add a person to a photo on your iPhone using the Cutout tool from its bottom panel. The tool comes with a Manual Mode and an Auto Mode that uses an algorithm to let you select people or objects from one image with a single tap and then place them over a background from another image.
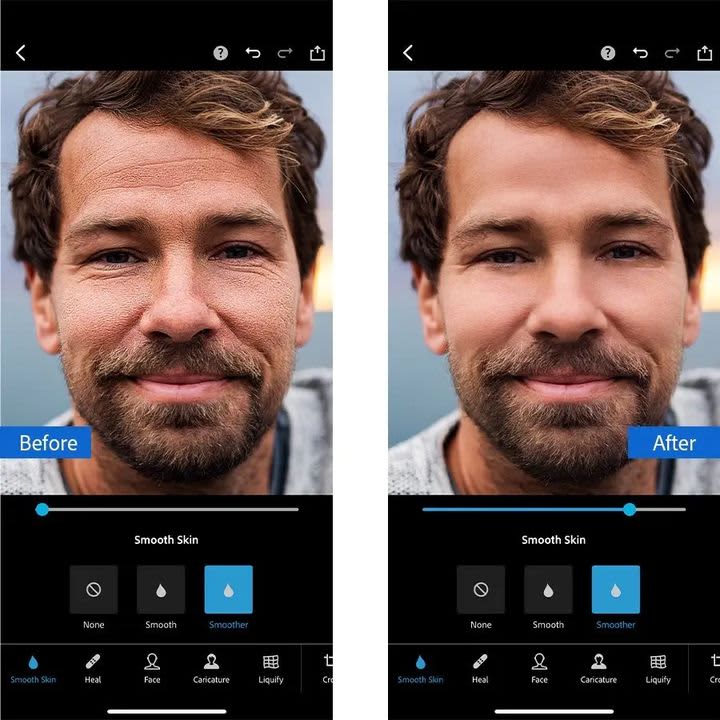
Retouching facial features
The Retouch workspace is designed for touching up facial features and skin. In its bottom panel, the Smooth Skin icon, shaped like a water droplet, uses AI to find relevant areas of skin and smooth them out as little or as much as you want. The Face tool lets you change the dimensions, angles, and contours of your whole head at once or just specific facial features, like your bottom lip or nose.
The neighboring Caricature tool is like an exaggerated version of the Face tool. It tweaks specific facial features to make you look like a cartoon. You’ll also find also a familiar tool, Liquify, from the desktop version, which lets you reshape parts of your photo with artistic twirls, smudges, and swells.
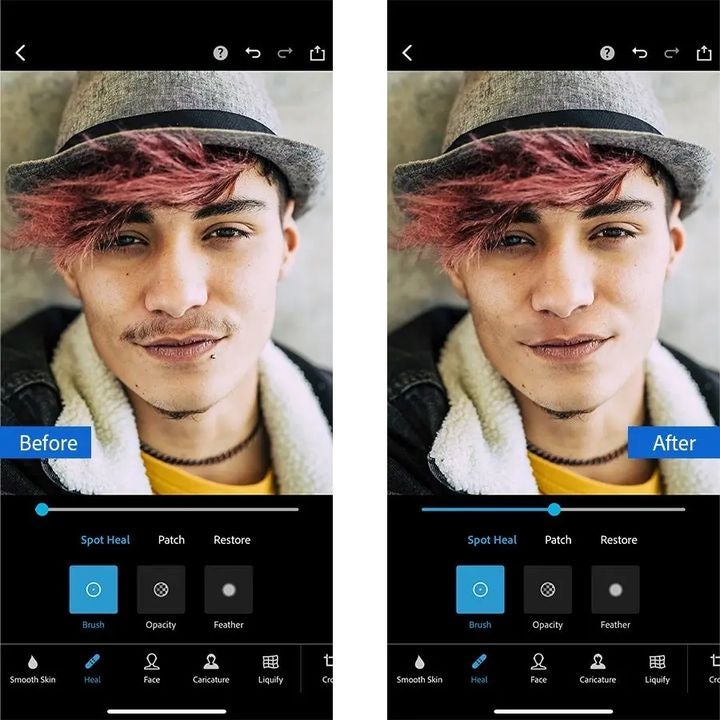
The icon showing an adhesive bandage is a smart Healing tool. It works like the Content Aware tool in the desktop Photoshop app, with a special algorithmic focus on facial blemishes.
For instance, to remove an unwanted freckle:
- Start by using two fingers to zoom in on the freckle.
- Adjust the fader to set the size of the spot you want to remove.
- Tap on the spot to automatically and intuitively replace it with the app’s best guess of pixel colors from the surrounding area.
Using Photoshop with your iPhone is easier than ever
The menu systems in Photoshop Express may seem a bit cluttered, but that’s because the app is stuffed full of features. These include all the features from the late Adobe iPhone apps Photoshop Mix and Photoshop Fix, which were discontinued in 2021.
Photoshop Express is free for basic use, and there’s also a subscription option and in-app purchases if you need more advanced editing.