How To
How to Create panoramic photos in Adobe Photoshop
- June 6, 2012
- Updated: July 2, 2025 at 8:49 AM
![]() Sometimes taking a normal 4:3 aspect ratio photograph just doesn’t it cut it when trying to convey the beauty of a particularly breathtaking landscape. That’s where panoramic photos come into play. There are plenty of phones and digital cameras that include modes for panoramic shots, but the quality of the shots leave much to be desired. They usually come out grainy or very low resolution as it takes some serious CPU power to stitch photos together.
Sometimes taking a normal 4:3 aspect ratio photograph just doesn’t it cut it when trying to convey the beauty of a particularly breathtaking landscape. That’s where panoramic photos come into play. There are plenty of phones and digital cameras that include modes for panoramic shots, but the quality of the shots leave much to be desired. They usually come out grainy or very low resolution as it takes some serious CPU power to stitch photos together.
I’ll show you how to get professional, high resolution, and high quality panoramic pictures using a digital camera and Adobe Photoshop. While there are plenty of applications that help create panoramic shots, Adobe Photoshop actually produces better results and will save you money if you didn’t know it already did this!For this tutorial, I’ll be using Adobe Photoshop CS5 but the procedure should be similar, if not the same, on the upcoming CS6 release.
The first thing you want to do is to take a bunch of pictures that you want to stitch together. Start from your left and rotate your body to the right, taking photos along the way to. You can try a 180º field of view or go all out and do a 360º panorama. Take your time and make sure to have some overlap so Photoshop knows where to stitch the photos.
To begin creating your panorama, go to ‘File,’ then ‘Automate’ and finally ‘Photomerge.’ This will open up a window where you can select what type of panoramic shot you want to create. Stick with ‘Auto’ first and see if you like the results.

Next, you’ll have the option to either add all of the images currently opened in Photoshop or to browse for specific files. It doesn’t matter what order your photos are in as Photoshop will figure out the correct sequence for you. When you’re ready, hit ‘OK’ and Photoshop will start crunching the photos together. If you have a lot of shots, this can take a while, so be patient.

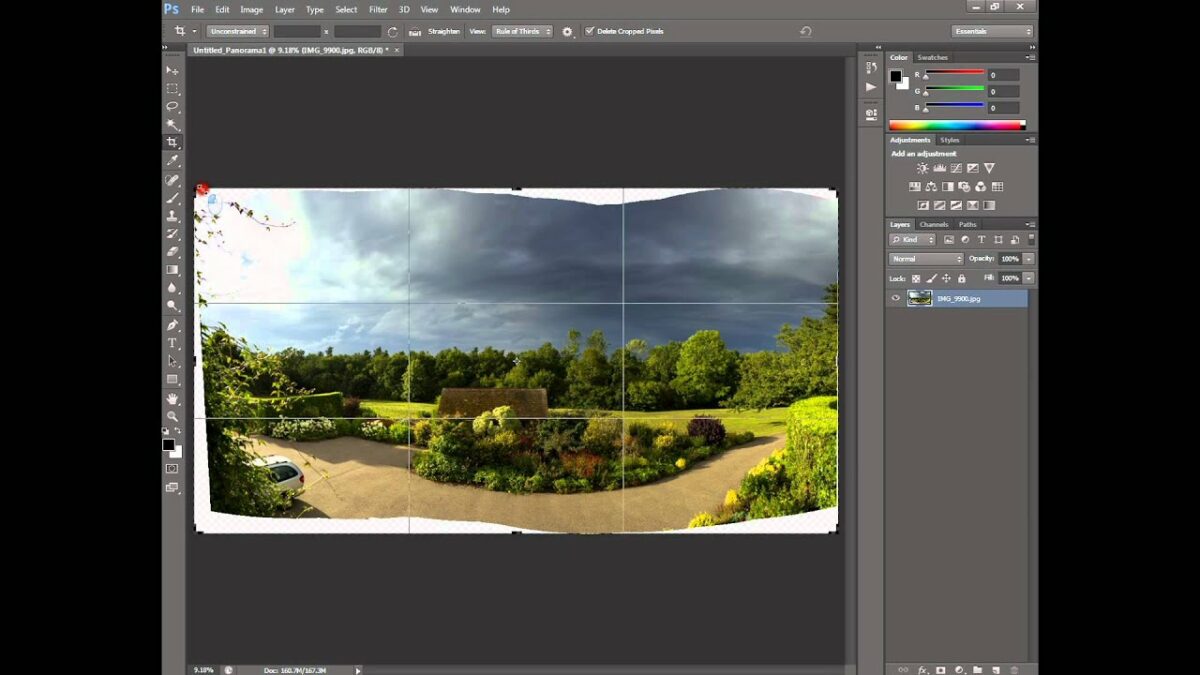
After Photoshop is done stitching your photos together, you can view the rough cut.

You’ll want to use the crop tool to crop out the usable parts of the photograph. Be careful to crop precisely as you do not want any of the alpha (transparency) to show up in your final product. It is a good idea to take pictures of a wider area than you want to capture to give you more area to crop.

After you’re selected your crop area, hit the ‘enter’ key and you’re done! Save or export it to the file format you want and share with your friends. If you already have Adobe Photoshop installed on your computer, take advantage of this advanced feature and create some breathtaking photos!

You may also like
 News
NewsMore and more people are looking for information with AI… but they hardly click on the results
Read more
 News
NewsJohn Boyega wants to star in the ultimate 'Star Wars' parody, and he has his reasons
Read more
 News
NewsThis movie is Sergio Leone's great hidden gem and you can watch it streaming right now
Read more
 News
NewsBattlefield 6 wants to be as realistic as possible, but a single skin has managed to destroy the goodwill of the community
Read more
 News
NewsThey promised us season 2 of one of the best series of the last five years. Sadly, it may never arrive
Read more
 News
News'Wizards of Waverly Place' came to Disney by chance. Almost 20 years later, it still has new episodes
Read more